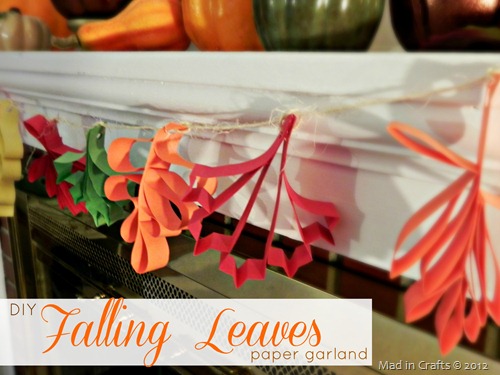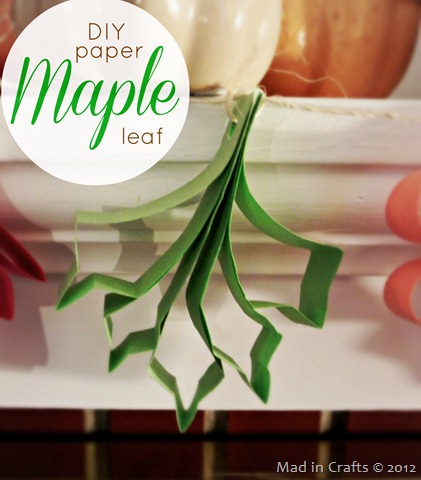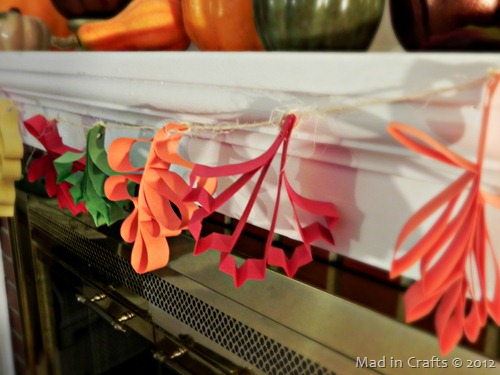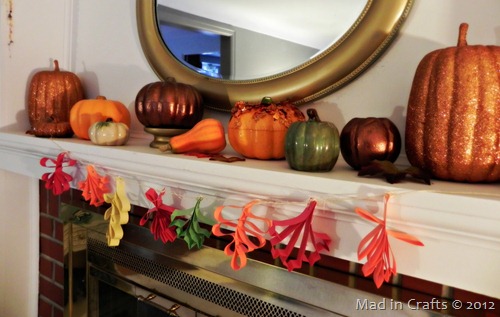
I tend to break out the Fall décor earlier than most households, but it’s only because I love Fall so much! As soon as Labor Day is over, I bring out my collection of pumpkins and leaves. This year I added to my collection of autumn decorations with a simple paper garland made to look like falling leaves. I created the garland with some great products from EKSuccess Tools.
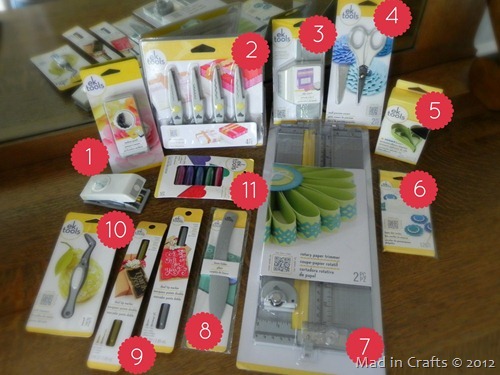
Look at all these great tools in their new line! I especially love the adorable packaging. Each package has a photo of a project idea you can do with that particular tool. The packages also have a QR code that will give you more info about the tool and what you can do with it. Super smart!
PICTURED:
-
Scallop punch
-
Decorative scissors
-
Decorative edge punch
-
Precision scissors
-
Permanent adhesive roller
-
Foam dot circles
-
Rotary paper trimmer
-
Bone folder
-
Gold and silver dual tip markers
-
Craft tweezers
-
Glitter
I only used a few of these EKSuccess Tools for this project, but I have already tried out most of the rest of them for other projects I have done lately. You can get your own EKSuccess Tool at select Walmart stores.
To make a Falling Leaves Garland, you will need:
EKSuccess Rotary Cutter
EKSuccess Bone Folder
EKSuccess Permanent Adhesive Roller
construction or scrapbook paper
hole punch
twine
EKSuccess Scissors
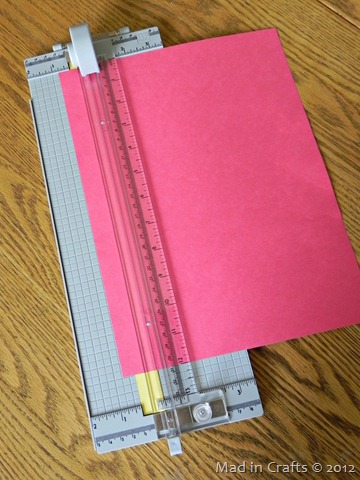
I began by using the EKSuccess Rotary Cutter to cut my paper in 3/4 inch strips. This is the first step for each of the varieties of paper leaves. I have the directions for each type of leaf broken up in to sections below.
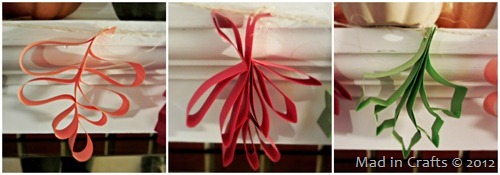
FOR THE MAPLE LEAF, YOU WILL NEED:
5 strips of paper
EKSuccess Bone Folder
EKSuccess Adhesive Roller
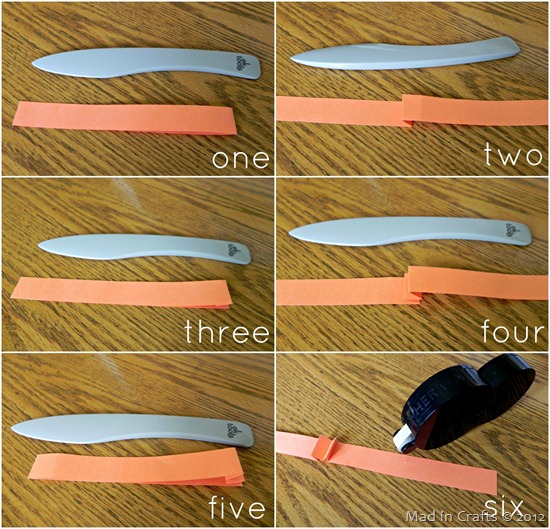
- Fold one strip of paper in half, and crease the fold.
- Fold one end of the paper back 1/4 inch, and crease that fold.
- Fold that same end back in the first direction 1/4 inch. Crease the fold.
- Fold the end back the second direction 1/4 inch. Crease the fold.
- Fold the end back the first direction 1/4 inch one last time. Crease the fold.
- Run a small strip of adhesive on one side of the interior of the strip about 1 inch from the folds. Press the two ends together to glue.
- Repeat steps 1-6 three more times.
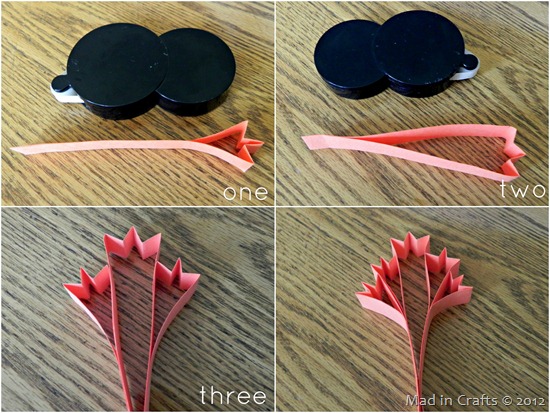
- Repeat steps 1-5 again a fifth time.
- Run a small strip of adhesive on one side of the interior of the strip about 2 inches from the folds. Press the two ends together to glue.
- Gather your folded maple leaf sections.
- Run a strip of glue on either side of the widest section.
- Glue a narrow section on each side of the wide section, about 3/4 inch from the top.
- Run a strip of glue on one side of each remaining narrow sections. Glue them to the outside of the leaf, about 1/3 inch from the top.
TO MAKE AN OAK LEAF, YOU WILL NEED:
3 strips of paper
EKSuccess Roller Adhesive
- Roll a small strip of adhesive near one end of a strip of paper. Fold it over and glue 1 inch from the other end of the strip. DO NOT CREASE!
- Place a small strip of adhesive in the middle of this paper loop. Glue the loop onto itself to make a wave.
- Roll a small strip of adhesive near one end of the second strip of paper. Glue it to the first strip on the opposite side from the loop. Create another loop, gluing the paper just below where you began with this strip.
- Roll a small strip of adhesive at the end of this second strip of paper. Glue it to the first strip of paper just below your last loop.
- Repeat steps 3 and 4 on the opposite side of the leaf.
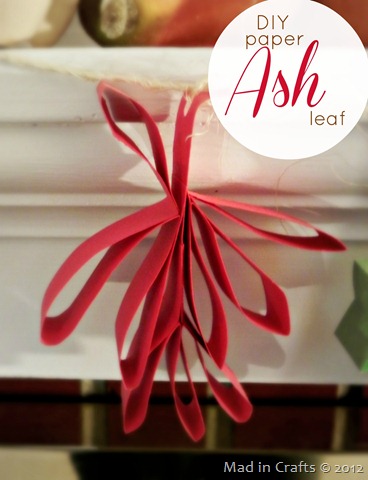
TO MAKE AN ASH LEAF, YOU WILL NEED:
4 strips of paper
EKSuccess Bone Folder
EKSuccess Roller Adhesive
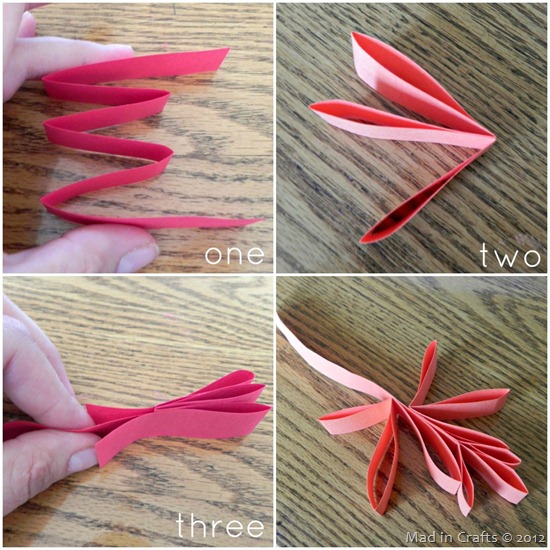
- Fold one strip of paper using an accordion fold. Crease the folds.
- Glue the ends of the folds together with the roller adhesive, as shown. Repeat 3 times.
- Insert a straight strip of paper into the accordion fold, as shown. Glue in place with the roller adhesive.
- Glue the remaining two leaf sections onto the straight strip of paper using the roller adhesive.
Once you have as many leaves made as you would like, it is time to string them on the twine. I used a regular paper punch to punch a hole in the stem of each leaf. I tied a LOOSE square knot to attach each leaf to the twine. The loose knot serves two purposes: 1) you don’t have to worry about ripping your paper with the knot, and 2) you can move a loose knot up and down the length of twine to position each leaf exactly where you want it.
Hang your garland on your mantel, over a doorway, or anywhere in your home that needs a fall touch!
If you are interested in any of the great products I mentioned today, be sure to check out EKSuccess’ new line of craft tools. Follow them on facebook or on Spotted Canary for more craft ideas!
Full disclosure HERE.
CHECK OUT THESE OTHER GREAT IDEAS FEATURING EKSUCCESS TOOLS!
The post Falling Leaves Paper Garland appeared first on Mad in Crafts.
